Bear Sailor: A Small Business Embroidery Design Review
First Impression: Playful, Professional, and Instantly Recognizable
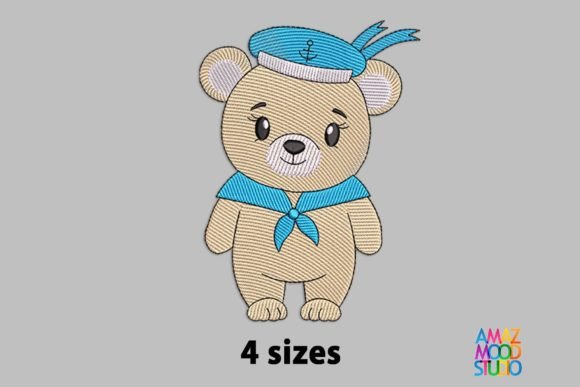
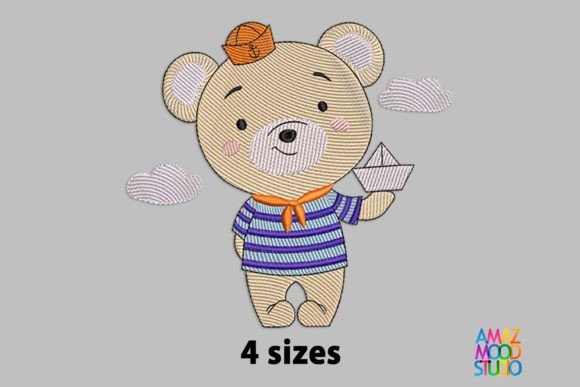
As an embroidery designer who’s developed hundreds of commercial designs for small businesses, my first reaction to Bear Sailor is immediate warmth—balanced with practical assessment. The name alone evokes a friendly, approachable character: not overly cutesy, not cartoonish, but grounded in classic Teddy Bears charm with nautical flair. That duality makes it versatile. It reads as handmade yet polished—ideal for boutiques, cafés, pet brands, florists, or creative studios wanting to signal authenticity without sacrificing professionalism.
Real-World Performance Across Merchandise Types
Bear Sailor shines where many embroidered characters fall short: scalability and storytelling. As an embroidered patch, it holds up beautifully at 2”–3” sizes—clean outlines, balanced proportions, and expressive features that translate even without fine detail. For staff uniforms and apron embroidery, its compact silhouette works well on chest pockets or sleeve cuffs without overwhelming the garment. On caps, it reads clearly on front panels when digitized with appropriate stitch density and underlay—especially on structured cotton twill or denim.
For tote bag design and custom apparel, Bear Sailor adds personality without cluttering the canvas. Its nautical motif subtly reinforces themes of adventure, care, or local charm—perfect for a coastal bakery, indie bookshop, or pet grooming studio building brand identity through consistent, tactile assets. As a product label accent on handmade soap wraps or candle packaging, it elevates perceived value while staying legible in small-scale applications.
Etsy sellers and craft-based brands will appreciate how Bear Sailor supports a cohesive visual language across digital and physical touchpoints. Paired with a simple font and neutral palette, it anchors a printable mockup series or social media banner set—making it more than just an embroidery file; it becomes part of your core design assets.
Where to Use Bear Sailor Thoughtfully
While Bear Sailor is highly adaptable, certain production conditions require attention. On curved surfaces like cap fronts or tapered tote handles, test stitching is essential—some digitizing may need slight adjustment to prevent distortion in the bear’s face or sailor collar. Avoid scaling below 1.5” unless you’ve verified the embroidery file maintains clarity at that size; fine details like anchor motifs or rope textures may collapse or become indistinct.
Dark uniforms demand careful thread color selection—opt for high-contrast combinations (e.g., navy thread on light khaki, or cream on charcoal) rather than relying on default digitized colors. Also, assess fabric texture: dense terry cloth or heavy linen may mute fine stitch work, so choose stabilizer wisely—a medium-weight cutaway often delivers clean results for this style of machine embroidery design.
Frequent washing? Confirm whether the design uses satin-stitch borders or dense fill areas that could stiffen over time. If used on aprons or staff shirts worn daily, prioritize smooth, low-profile stitching over decorative dimensionality—Bear Sailor’s charm lies in its simplicity, not embellishment.
How Bear Sailor Strengthens Brand Identity & Customer Trust
In small business merch, consistency builds recognition—and recognition builds trust. Bear Sailor isn’t just decorative; it’s a visual shorthand. When customers see it on your café apron, your bakery’s tote, or your pet brand’s bandana, they’re subconsciously connecting your values: warmth, reliability, craftsmanship. Unlike generic clipart, a well-executed embroidered patch signals investment—in quality, in story, in the handmade product experience.
That perception directly affects buyer engagement and perceived product value. A customer paying $28 for a linen tote feels justified when the embroidered patch looks intentional, balanced, and professionally finished—not rushed or pixelated. Likewise, staff wearing uniforms with Bear Sailor embroidery project cohesion and pride, reinforcing your brand identity internally before it ever reaches the customer.
Practical Designer Notes Before Production
Before committing to bulk runs or client projects, follow these proven steps:
- Test in black and white first—this reveals contrast issues and spacing inconsistencies invisible in color previews.
- Verify small-patch viability: embroider a 1.75” version on your target fabric to confirm readability of facial features and sailor hat shape.
- Review thread color contrast against your base fabric—especially for dark or textured materials.
- Inspect spacing between elements—tight gaps between the bear’s arms and body or hat brim can cause stitching errors if too narrow.
- Confirm hoop size compatibility with your embroidery machine and intended placement (e.g., cap frames vs. flat hoops).
- Test on real fabric, not just stabilizer—fabric stretch and nap dramatically affect final appearance.
- Use proper stabilizer: lightweight tear-away for stable cottons; cutaway for knits or delicate linens.
- Create a printable mockup for client approval—show Bear Sailor on actual garment photos, not blank templates.
- Compare alongside other design assets: does it harmonize with your logo, typography, and packaging palette?
- Confirm commercial licensing before using in paid merchandise—this applies whether you're selling embroidered patches directly or offering custom apparel services.
Remember: a strong digital embroidery file is only as effective as its execution. Bear Sailor gives you a solid foundation—but thoughtful testing, smart digitizing choices, and intentional brand alignment turn it into a true asset for your small business merch strategy.